Being a 'get in there and do it' sort of person, I have often found myself pulling up my long sleeves before I get into something. I end up with stretched sleeves and wrinkles at my elbows.
To help solve this problem, and not get too cold by wearing a short sleeve shirt, I adopted the 3/4 tee into my wardrobe. They are just brilliant for everyday get it done wear, as well as looking a little dressier for special occasions. I have found I wear 3/4 tees more and more and have decided to refashion some of my long sleeves to 3/4 tee's.
So today for my blog post I'm happy to present the long sleeve tee to 3/4 tee tutorial.
What You Will Need:
Long Sleeve Tee
Measuring Tape/Ruler
Scissors/Pinking Sheers
(Extra: 3/4 tee to use as a guide)
Take your long sleeve and lay it down flat, Try and get all the wrinkles out of it.
Fold it in half long ways so both sleeves meet. (Sleeve on top of sleeve)
Once again make sure everything is smoothed out and that both sleeves fit perfectly on top of each other. When you cut them together later on you want both sleeves to be the same length.
If you have a 3/4 tee already that you like the length of, fold it in half also and place it on top of your folded long sleeve as a guide. Make sure the armpit and top of the shoulder are in the same place on both tees. If you don't have a 3/4 tee to use as a guide, just skip this step.
Take your measuring tape/ruler and measure from the end of the long sleeve to the end of your 3/4 tee sleeve, or to the length of 3/4 sleeve you would like to have. Now take away a few centimetres to allow for a double folded hem. (See Picture below)
Take your scissors/pinking sheers and cut along your pinned line.
Turn your new 3/4 tee inside out and fold about a centimetre up and then fold the same up again creating a hem.
Pin your hem line in place and finish it off by sewing a line of straight stitch on your sewing machine to to create a new hemmed finish to your sleeve or you could hand sew to finish it instead.
And there you have it, you've turned an long sleeve tee into a 3/4 tee.
It's really easy and I hope you enjoyed this tutorial. Go and have fun with this idea and
I hope you find 3/4's just as great to wear as I do.
Written By
Anita
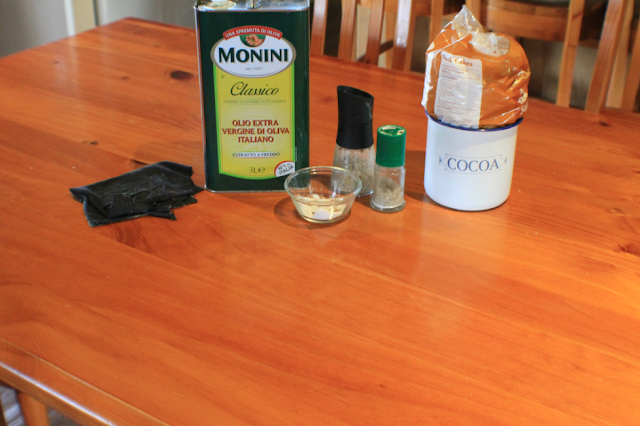
Solid wood tables have a lovely look and are pretty hard wearing for the most part, but when the varnish starts to get old, anything hot put on the table tends to leave a burnt, smoky mark. Today I want to show you how you can fix these marks and give your wood table more life.
Materials
- Olive oil
- Salt (the coarseness depends on what you prefer, coarser salt will make the job faster, but has a tendency to leave scratches. Table salt will probably be OK.)
- A rag
- Container and weights (optional)
1. Pour a bit of olive oil onto the mark you are trying to remove
2. Sprinkle an equal amount of salt onto the oil
3. Now take your rag and using a circular motion rub the salt and oil into the mark.
NOTE: If the mark is very deep and taking a while to come out, try and use a slightly coarser
grain salt.
4.Some marks can be deep and require some patience and a good deal of rubbing in. As a helpful tip, if you get something heavy and put it on top of your rag all you have to do is push it around.
5. And there you have it! Your smoky varnish is gone.
Well, I hope you found this little DIY helpful and that your tables are the better for it.
I have done my fair share of cleaning over time and I know
the value of good tools and tips.
Having said that I am happy to share with you a
little list
of 5 tips and tricks
that I have found to be super helpful to me.
Plastic
bags to stop the sink leaking
I don’t know about you, but it is
so annoying when your sink plugs start giving out and pretty soon you have no
water left in the sink to wash with. One day I needed a quick fix and thought I’d
cut up a plastic bag and use it as an extra seal between the plug and drain. It
works better than anything else I've tried, including buying a new plug.
Eucalyptus
spray takes out oil stains
Oil stains are one of the hardest
stains that I have had to try and get out of clothes and up until just recently
I had almost given up on the possibility of getting them out. I tried different
stain removers, some being very time consuming but still giving poor results. One
day my sister suggested I try Eucalyptus spray to get out my oil stains. I sprayed
it on the clothes straight away and put it in the wash. When it came out I was so surprised,
I couldn't see where the stain had been. I found out later that Eucalyptus has
been a well know great oil stain remover.
Magic
white sponges clean everything
You may have never heard of magic
white sponges before but I must say they are one of my favourite cleaning tools.
They work very similar to micro fibre clothes but are even better for getting
marks of walls, cleaning smooth surfaces like the bath tub, sink, glass, shower
screen, splash back, fridge and the list goes on. It’s hard to describe how
easy it is to clean with them and I hope you go out and buy yourself some and
give them a try so you will know first-hand how great they are. P.S If you like
them go on Ebay to cheaply buy them bulk. And, you don’t need to use any soap when you
clean with them.
Dust
your skirting and house with a cobweb duster
Being a cleaner I know the value
of a good tool. I some times have to quickly dust an entire house in a short
time and when this happens you start thinking up ideas on how to make life
easier. I was cobwebbing one day and thought why not use it to dust the
skirtings as well. From then on I now dust all my skirtings, curtain rails and
doorways with my cobwebber. Go for it, see what a great tool the old cobwebber
is!
Olive
oil and table salt varnish repair
For the in detailed
recipe and how she does it check
back for next weeks blog post!
Written By
Anita


